

Nails Inc. asked everyone who attended their recent event to create a nail design with Nails Inc polishes. I'm not the best with nail art (not ambidextrous enough) so I wanted to create an easy simple glitter look that wasn't too OTT. I don't usually wear glitter polishes but I was drawn to these three Nails Inc. colours.


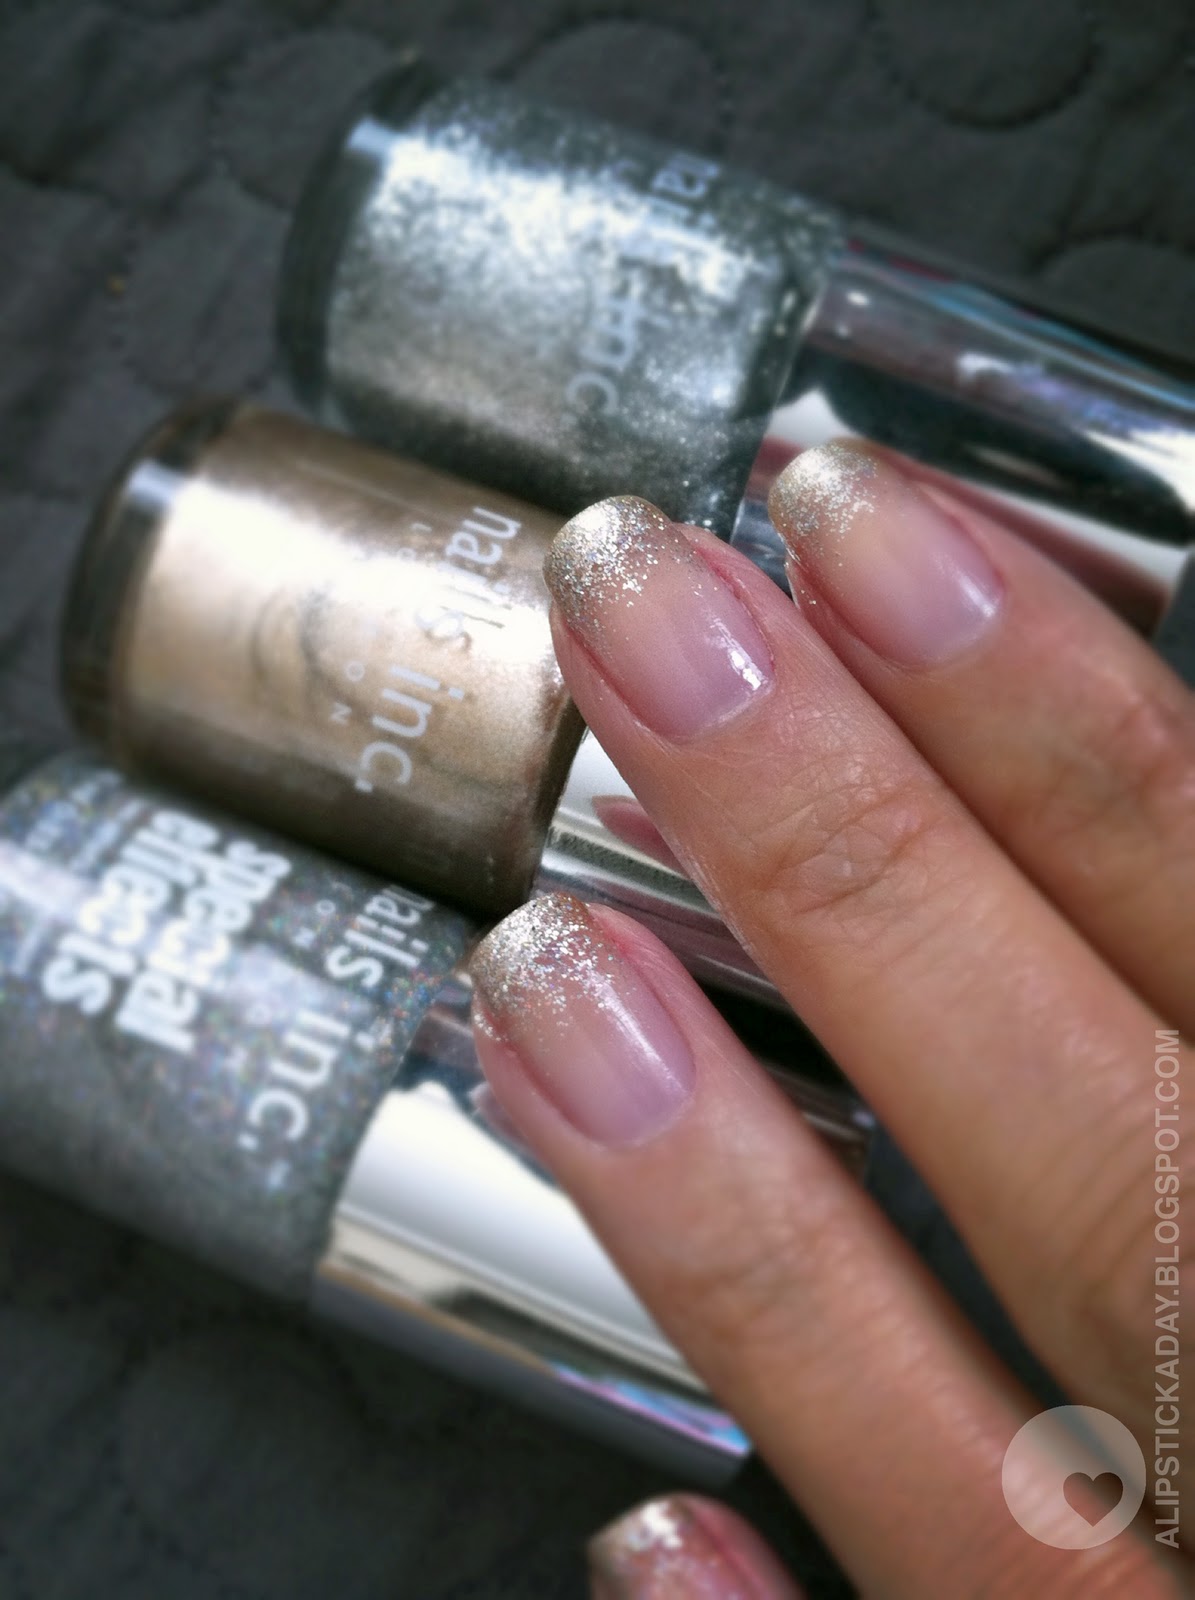
I started off with Westminster Abbey on the tips, then layered Electric Avenue over the top, and finished with Electric Lane to blend over for the gradient effect.

If you like my simple nail design then please vote for it by liking it on Facebook here


20 October 2011 at 17:00
I LOVE this!! I'm trying it out right now! Lol.
In reguards of layering the Westminster Abbey and Electric Avenue, do you compleatly cover the Westminster Abbey with Elictric Avenue, or 50/50 it?
I hope this makes sense :p xx
20 October 2011 at 20:13
This looks fab x
20 October 2011 at 21:50
Thanks Stundon!
Hi Sian - I painted one coat of Electric Avenue over Westminster Abbey, about ⅓ or half down the nail. The glitter won't completely cover Westminster Abbey. Then I painted Electric Lane over to blend over any harsh lines. I'm not very good at explaining with words - maybe I should take some step by step photos over the weekend?
20 October 2011 at 23:27
LOVE this! I love the gradient yet subtle effect you have created, really is a classic with modern twist look!
http://hushed-secrets.blogspot.com/
Em xx
13 November 2011 at 05:31
I bought this today and I'm going to try it when I return to HK sweetie!